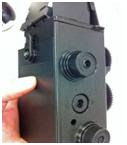
kamera lomo

Sunday, March 13, 2011

mencuci film sendiri?


negatif B/W

A. Alat – alat

- Film negatif / klise (hitam putih asa 100)
- Gelas pengukur
- Tabung pencuci
- Penampan + sendok pengaduk
- Ember
- Gunting
- Kamar gelap/kaos hitam
- Stopwatcth

B. Bahan – bahan

1. Obat pengembang (minigrain)
2. Obat penghambat (air sumur)

C. Cara kerja
  • Siapkan kaos hitam yang di gunakan sebagai kamar gelap dan penampan sebagai wadah pencuci
  • Siapkan campuran developer (minigrain) pada wadah satu kemudian campurkan dengan air secukupnya dan diaduk (minigrain yang kecil kemudian yang besar)
  • Siapkan air secukupnya pada wadah kedua kira – kira 1 liter
  • Ambil gambar dengan pengaturan diafragma & speed yang tepat
  • Masukan kamera, gunting dan tabung pencuci kedalam kaos (kamar gelap)
  • Keluarkan film dari kamera dan kemudian di potong
  • Masukan film tersebut ke dalam tabung pencuci
  • Masukkan larutan minigrain kedalam tabung pencuci secukupnya
  • Putar searah jarum jam secara berulang-ulang jangan berbalik arah selama sekitar 12 menit
  • Keluarkan larutan minigrain ganti dengan air sumur sebagai obat penghambat sekaligus sebagai pembersih dalam waktu secukupnya dan di kocok
  • Buka tutup minigrain
  • Ambil dan bersihkan film tersebut dan lihat hasilnya berhasil atau tidak
  • Keringkan film tersebut

D. Hasil Praktek


IV

tempat cuci film dan scan

banyak dr teman2 menanyakan dimana dapat mencuci filmnya setelah selesai memotret dengan kamera lomonya, saya dapat berbagi sedikit tempat yg dapat mencuci film ukuran 120 dan 135 di daerah jakarta,

lomography embassy store
jln bumi no 17 mayestik, kebayoran , jaksel
no telp 021-7395302
jam buka : 12:00 - 20:00
jasa cuci dan scan ke cd : rp 35,000,-


- Istimewa Foto
Jl kebayoran Baru No. 16e
Kebayora Lama telp 7204107, 7269492
Jak - Sel (pasar kebayoran/di bawah fly over)
Keterangan Biaya : 
Cuci 120mm Color / BW : Rp. 8000
Cuci 135mm Color / BW : Rp. 6000 (kalo gak salah,lupa gw)
Scan (include CD) : Rp. 15000/roll
Film 120mm BW : Rp. 10000/roll
*kadang-kadang suka ada stock film 120mm

- Foto Praga
di depan persis URBIE jatiwaringin
Keterangan Biaya :
Cuci : 10.000
Scan + CD : 20.000
*bisa ditunggu 1jam-an katanya

- Maya Studio
dari jatiwaringin ke arah pondok bambu, letaknya depan pom bensin yang pertama kali diliat hehe adanya di sebelah kiri, sebelahnya persis kayaknya sih supermarket apa gitu ahaha
Keterangan Biaya :
Cuci : 5.000
Scan + CD : 12.000
*pelayanannya cepet & tinggal request bersihin scannernya + jgn terlalu byk di "mainin" hasil fotonya.

- Jakarta Foto
Jl. H. Agus Salim 35A (sabang). Telp 9309233
Keterangan Biaya : 
cuci + scan warna dan BW film 135: 40 ribu (incld cd)

- Adiwarna
Jl. H. Agus Salim No. 48 (sabang). Telp 3100465
cuci + scan warna film 135: 25 ribu (incld cd)
*gak bisa proses BW

- Pasific Foto
Jl. Letjend. Soeprapto no. 90 (sebelah selatan fly over Senen)
Keterangan Biaya :
cuci: 8rb/roll (ga bisa BW)
scan: 10rb/roll (uda tmasuk CD)
*cuma bisa proses film 135mm

- Modern Photo
JL.Raya Ragunan No.8c. Pasar Minggu-Jakarta Selatan. Telp (021) 7890987
Keterangan Biaya :
Cuci+scan Rp.15.000/roll
Plus Cd nambah Rp.10.000 (ky'a blh bawa flashdisk)
*BW atau Warna sama aja


- Metro Atom Lantai 2. Pasar Baru

- Heyfolks!
Jl. Bumi no 17 Mayestik, Kebayoran baru, Jakarta
telp 021-93150452

Tangerang
- Champion Photo
Supermall Karawaci, Tel. 5489121
Keterangan Biaya :
cuci : 10rb
scan + cd : 20rb
Proses nya plg lama 30 menit/film.
*scan foto nya bisa berikut sprocket hole nya

- Yen Pop
Jl. Raya Serpong Km. 7 No. 8. Telp : 021-70201359
Keterangan Biaya :
cuci film negative : 5rb
scan : 10rb
index print : 3rb

- BAT Color Photo Lab
Jl.Kisamaun No.91 Pasar Lama-Tangerang
Keterangan Biaya :
cuci+scan = Rp 22.000/roll

Bandung
- FotoPro 
Jl. IR. H. Djuanda No 310. Phone 022-2500304
Keterangan Biaya : Cuci+Scan+Dvd = 20rb/roll

- Seni Abadi
Jl. Wastu Kencana no 87
Keterangan Biaya : cuci+scan 35mm/120mm = Rp20.000,- (resolusi standar), Rp30.000,- (resolusi tinggi)

- Seruni Merdeka photo Bandung
Jl.Merdeka no.49 Bandung, depan BIP
Keterangan Biaya : 
cuci 135 biasa >> bisa, cuci + cetak + scan = 35rb
*ada film Fuji Superia ASA 200 expired 2 bulan lagi diskon 50% = Rp.8.250
*cuma bisa proses film 135 doang [tanpa sprocket]

- Papyrus Photo 
Jl. Bengawan No 29. telp 022-7234596, 022-7234576
Keterangan Biaya : Scan + Roll + CD = 20rb/roll

- Jonas Photo
Jl. Banda 38. Phone (022)4201-1010
*udah jarang stock film 120mm

- Nasir Photo
Jl. Tamansari No. 9 Bandung. [deket UNISBA sebelum Circle K. masuknya dari taman flexy]
Keterangan Biaya : 
cuci film bw 135/120 = 10rb/roll
cuci film color 135 = 6rb/roll
cuci film color 120 = 8rb/roll
scan = 6rb/roll
*siapin flashdisk sendiri, buat mindahin hasil scan-nya 
*bisa scan film 35mm dengan sprocket hole-nya

- Kamal Photo
Jl. Braga 91, Bandung. Phone 423-4326

- EAT 347
Jl. Trunojoyo No.4, Bandung Jawa Barat
Contact : 022 4200515

Yogyakarta
- Central photo colour lab
Jl. Solo 50 yogyakarta, Telp. 0274 515396
Keterangan Biaya : 
Cuci 35mm : Rp. 5000
Cuci 120mm :Rp. 5000
Scan 35 mm : Rp. 15.000
Scan 120mm :Rp. 20.000


Malang
- FOTO Pantai
Jl. Merdeka Timur No.2 G Telp 366132
Jl. Basuki Rachmat No. 6 F Telp 326172
Jl. LetJend Sutoyo No. 64 Telp 491364
Jl. Borobudor Blok B-2 Telp 495625
Jl. Galunggung 58 Blok E & F Telp 565662
*ditambahin 0341- buat kode area

Keterangan Biaya :
Cuci= Rp. 5000
Scan=RP 500 per film (klo 1 roll 36 exp tgl kaliin aja Rp 500)
transfer CD=Rp. 4000

Pontianak
- Yakin Photo
Jl. Ir H. Juanda BB 7-8
Keterangan Biaya : 
Cuci/Proses = 9rb/roll
scan roll + cd = 9rb/roll

Batam
- M-Star Photo Studio
MegaMall Lt.UG N0.261 Batam Centre
Keterangan Biaya : Proses + Scan = 25rb/roll

Sumber : lomonesia


ga ada alasan untuk tidak menggunakan kamera analog, masi banyak tempat yg menyediakan jasa cuci dan scan


Thursday, March 10, 2011

film yg digunakan kamera lomo

ada 2 jenis film yg digunakan untuk kamera ini:

- 35 mm

- 120 mm


sedikit penjelasan ttg film 35mm:

35 mm film is the basic film gauge most commonly used for chemical still photography (see 135 film) and motion pictures, and remains relatively unchanged since its introduction in 1892 by William Dickson and Thomas Edison, using film stock supplied by George Eastman. The photographic film is cut into strips 35 millimeters (about 1 3/8 inches) wide—hence the name.[1][2] The standard negative pulldown for movies ("single-frame" format) is four perforations per frame along both edges, which makes for exactly 16 frames per foot[3] (for stills, the standard frame is eight perforations).

A wide variety of largely proprietary gauges were used by the numerous camera and projection systems invented independently in the late 19th century and early 20th century, ranging from 13 mm to 75 mm (0.51–2.95 in).[4] 35 mm was eventually recognized as the international standard gauge in 1909,[5] and has remained by far the dominant film gauge for image origination and projection despite challenges from smaller and larger gauges, and from novel formats, because its size allows for a relatively good tradeoff between the cost of the film stock and the quality of the images captured. The ubiquity of 35 mm movie projectors in commercial movie theaters makes it the only motion picture format, film or video, that can be played in almost any cinema in the world.

The gauge is remarkably versatile in application. In the past one hundred years, it has been modified to include sound, redesigned to create a safer film base, formulated to capture color, has accommodated a bevy of widescreen formats, and has incorporated digital sound data into nearly all of its non-frame areas. Since the mid-1990s, Eastman Kodak and Fujifilm have held a duopoly in the manufacture of 35 mm motion picture negative film. However print film continues to be offered for sale by Agfa-Gavaert (a maker of Aerial films split off from Agfa Photo before the latter's insolvency), as well as Lucky Films in China.

courtesy of wikipedia


The 120 format is typical of roll film. The spool was originally made of wood with metal flanges, later all metal, and finally plastic. The film is at least 30 inches (76 cm) long, up to 32–33 inches (81–84 cm),[1] attached to a piece of backing paper longer and slightly wider than the film. The backing paper protects the film while it is wound on the spool, with enough extra length to allow loading and unloading the roll in daylight without exposing any of the film. Frame number markings for the three standard image formats (6×4.5, 6×6, and 6×9; see below) are printed on the backing paper.
The 220 format was introduced in 1965 and is the same width as 120 film, but with about double the length of film and thus twice the number of possible exposures per roll. Unlike 120 film, however, there is no backing paper behind the film itself, just a leader and a trailer. This results in a longer film on the same spool, but there are no printed frame numbers. Moreover, it cannot be used in unmodified old cameras that have a red window as frame indicator. Also, since the film alone is thinner than a film with a backing paper, a special pressure plate may be required to achieve optimal focus if the film is registered against its back side. Some cameras capable of using both 120 and 220 film will have a two position adjustment of the pressure plate (e.g. the Mamiya C220 or Mamiya C330) while others will require different film backs e.g. the Pentax 645 or Kowa Six).
The specifications for 120 and 220 film are defined in the ISO 732 standard. Earlier editions of ISO 732 also provided international standards for the now-obsolete 127 and 620 film formats.

courtesy of wikipedia

10 golden lomo rules

1. Take your camera everywhere you go

2. Use it any time – day and night

3. Lomography is not an interference in your life, but part of it

4. Try the shot from the hip

5. Approach the objects of your Lomographic desire as close as possible

6. Don't think (William Firebrace)

7. Be fast

8. You don't have to know beforehand what you captured on film

9. Afterwards either

10. Don't worry about any rules

Tuesday, March 8, 2011

cara isi film di recesky reflex

How to load film into the Recesky (and Gakkenflex)
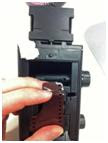
Step 1: Pull out the bottom knob slightly, so that it gives some space for you to insert the roll of film


Step 2: Insert your roll of film into the free spot at the bottom of the camera


Step 3: Push the knob back in, it should slot right into the roll of film that you have just inserted without any need of force. The Roll of film should now be locked in securely in the camera.


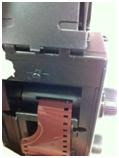
Step 4: In the next step, locate the take up spool as shown in the picture, and insert the roll of film into the take up spool such that it latches on to the spool.


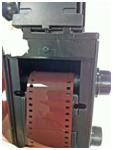
Step 5: Rotate the top turning wheel and you should see that the film should now rotate with the take up spool. This mechanism essentially allows you to move onto the next frame of the picture. E.g. you take a picture, and you rotate the wheel, which moves the film to the next frame to allow you to take the next picture.


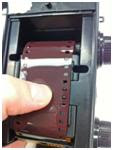
Step 6: Before you go ahead and close the lid, confirm that the wheel right below the take up spool latches on into the sprocket holes of the film. This is the mechanism that rotates the counter window on the side of the camera in between the two rotation knobs.


Final Step: Close the Recesky back door and make sure that it is latched closed and all gaps are sealed. Now rotate the top knob that advances the frames of the camera such that two whole frames are passed. Remember that one frame is equal to one arrow on the Recesky counter (e.g. a half rotation in the counter is equal to one frame).


Happy snappings

cara rakit recesky diy

how to:


The Recesky TLR is a “do-it-yourself” DIY or build it yourself camera. Not only that, it is a Twin Lens Camera – meaning that there is two lenses of the same focal length. One lens acts as the photographic lens (it takes the picture), whilst the other lens acts as the viewfinder lens (lets you see the picture).
Building the Recesky TLR is not as hard as it first appears – but it sure is great fun!
The first thing you notice when you look at the package the Recesky comes in is that it says assembly time is 1 hours. Without experience, the task may take from anywhere between 1 – 3 hours taking into consideration the time that’s needed to absorb all the information required in piecing together every step!
We hope this tutorial we have written here can be used to assist you in figuring out this puzzle and building process.
Note:The guide is meant to be read as an accompaniment to the instruction manual.
Before you start, remember these few important points:
• Take your time! Remember once you break something, there is no going back. Patience is the key. The parts are well constructed and are very solid, but if you find you are using excessive force in any of the steps then you are most likely doing something incorrectly!
• It is best to read ahead – or at least read what’s involved in the following steps and procedures as there are some sections that may appear out of order in the manual.
• As the camera body and parts are made of plastic, avoid tightening the screws too much in the beginning – tighten the screws only when adjoining and affected parts are firmly in place.
• Keep an eye out on the type of screw used in different sections – there are 3 types of screws used – rounded head (18 screws), flat head (2 screws) and capped head (5 screws).
• In some parts of the instruction manual it mentions an ‘accessory screwdriver’ – but the Recesky kit does NOT come with a screwdriver (the instructions may be possibly copied directly from the Gakkenflex kit – which is a more expensive kit sold in Japan as part of a magazine), so you’ll need to find a small screwdriver to build the camera. If possible, use a screwdriver with a magnetic tip – it will save you a lot of frustration if you need to undo a screw and it gets stuck inside the camera.
Without further ado, here is a step by step commentary on the instruction manual.


1. Assembling the Right Panel of the Body
The first step is pretty straightforward. Use the rounded head screws to secure the nut and triangular screw hole onto the right panel. At the end of this step the right panel should look like this:


2. Assembling the Left Panel of the Body
When assembling the left panel, take note of the order the parts are put together. During step 2, you will be using one of the cap screws to secure the counter, spring A and counter knob together onto the panel. The other screws used are the rounded head screws.
At the end of this step the left panel should look like this:


3. Installing the Front Panel and Shutter Assembly
This is one of the most important parts in assembling the camera! When putting together the shutter assembly, you will be using the two flat head screws that came in the box – this is important to ensure the shutter works as it should.
Fixing spring ‘B’ onto the shutter panel can be a little tricky – when it is fixed in place it should look something like this, secured with a cap screw:


Take note of the difference between spring ‘C’ and spring ‘D’ – they are orientated differently for the different parts of the shutter assembly NOTE: spring C and spring D is incorrectly mislabelled in the English instructions!. The easiest way to tell the dfiference, is by looking at these pictures. With spring ‘D’ fixed in place with a cap screw with a 1mm gap to the transmission lever, it should look something like this:


When spring ‘C’ is fixed in place, it should look like this:


When all parts are in place, you can tighten the cap screw for the transmission lever – don’t fix the screw in too tightly as it will cause the shutter to stick! You will know it is the correct tension when you can hear a crisp shutter ‘click’ when you test the shutter lever. Adjust the screws until you can see the shutter opening and closing smoothly every time you push down the shutter lever.

The finished shutter assembly should look like this:


The camera obscura assembly is fixed by two rounded head screws and a cap screw, and should look like this when secured:


4. Assembling the Inside Cover
The inside cover is another straightforward step – simply fix the back panel onto the bottom panel using rounded head screws and the hook with a cap screw. The assembled inside cover should look something like this (note: the kit we used had one cap screw missing but an extra rounded head screw – we used it with no issues).


5. Camera Body Assembly
Assembling all the separate pieces you have constructed so far to form the camera body can be a little tricky – just follow the instructions in the manual with patience. The key is not to secure any screws too tightly at the beginning – as doing so gives the material less flexibility and less room for movement and adjustment.
Firstly, fix the left and right side panels to the front panel using 6 rounded head screws.


Stick the mirror surface onto the lens fixed panel carefully using the double sided tape provided. The adhesive tape they used can be a little hard to peel off – but take some time to find both sides of the adhesive! Leave the plastic film on the front face of the mirror on until the fixed panel is secured into the camera body. When fixed in place, peel the two layers of protective film off the mirror – this should give you a smooth mirror surface like the one shown:


To put the film transmission axis in place, the side panel needs to be slightly flexible to give a little gap for it to fit. Insert the side of the nib first – and rotate the clickwheel until the transmission axis fits in place.


The same goes for the inside cover – the two side panels need to remain slightly flexible to let the nibs fit through.


Overall, fitting all the parts together for this step can be tricky and may require unscrewing and rescrewing some screws until you find the right flexibility level to do the job. After all the parts are in place, the screws can be securely tightened!


6. Viewfinder Assembly
To assemble the viewfinder, firstly fit the screen panel to the top cover. The screen panel material is quite hard, so it takes a bit of effort to get it in – patience is the key to avoid scratching the screen!


Putting together the viewfinder bracket is quite simple – just remember to put them in order as mentioned in the instruction manual.


Finally, fix the side panels with 2 rounded head screws


7. Lens Assembly
This is another critical part in assembling the camera as this will determine whether your photos will turn out right. When putting together the lens assembly, take great care to confirm the direction the lens is fitted into the lens frame, and not to touch the surface of the lenses!
When the lenses are secured in the lens frames, screw both frames onto the camera body at the same time, making sure the photographic lens frame (the one with the smaller hole) is on the bottom, and the viewfinder lens frame (the one with the bigger hole) is on top. The frames should be tightened until it reaches the end of the opening.


And that’s it… Congratulations! Your baby is ready for shooting – all that’s left is to load a roll of 35mm film!